The purpose of this article is to explain how you can connect your DotActiv Pro or Enterprise software to your own SQL database.
Creating A DotActiv Database
When you use DotActiv Pro or Enterprise for the first time and you want to connect it to your SQL database, please follow the below steps.
Step 1: Open the DotActiv application.
Step 2: Be sure to check the box next to ‘Select Database’.
Step 3: Enter your username and password and click ‘OK’.

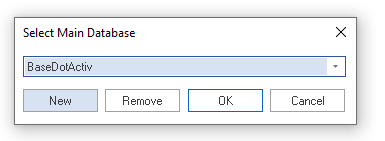
Step 4: You will be prompted with a ‘Select Main Database’ window. Here, select ‘New’.
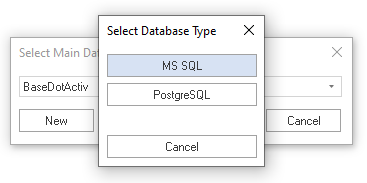
Step 5: Select your database type. The most popular is ‘MS SQL’.
Step 6: Next, select your Open Database Connectivity (ODBC) driver. The most popular one used is ‘SQL Server’.
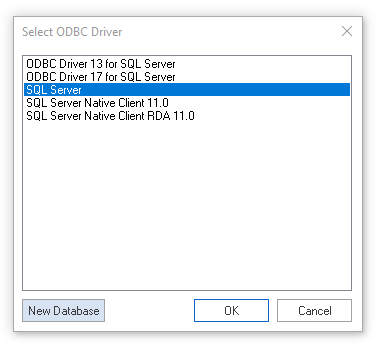
Step 7: Click ‘New Database’ and give your database a name. For example, DAMyDatabase.

Please note that when you enter the name of the new database you can also choose to create a new system folder by selecting ‘Generate New System Folder’.
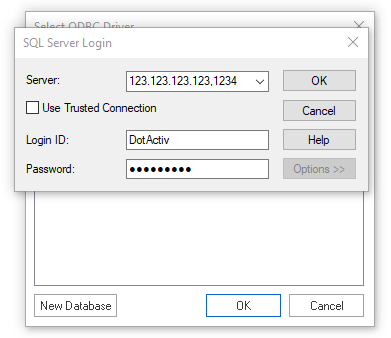
Step 8: Enter your SQL Server login details. Please speak to your IT department or the relevant person at your company for these details if you do not have them on hand.
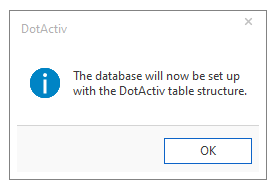
Step 9: Once you have entered your details, you should receive the following screen informing you that your DotActiv database will be set up.
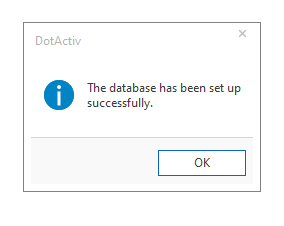
Step 10: The DotActiv software will now build your new database with the necessary structure. Once done, you should receive the following screen
Step 11: To confirm that all was successful, you can look at the footer of your DotActiv software to see if your DotActiv database is connected to the database that you created.

You have now successfully set up a brand new database for your DotActiv application.
Matching Configurations To The DotActiv Software
It is important to note that your configuration (FLP Format) matches your DotActiv software. If you make changes in your database regarding your FLP format, it must be on par with your DotActiv software.
To ensure that happens, please follow the below steps.
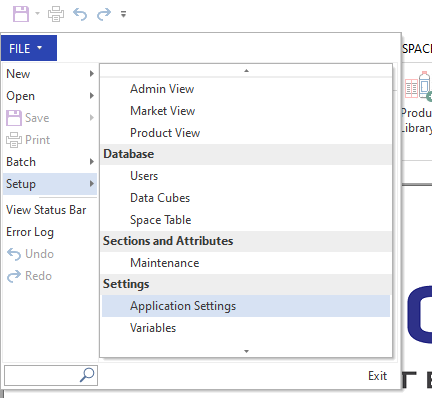
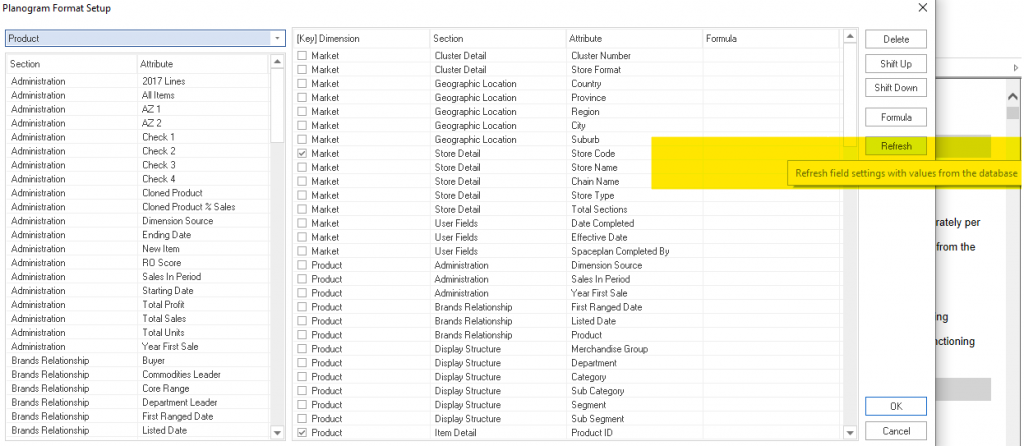
Step 1: Click on ‘File’, then ‘Setup’ and ‘Application Settings’.
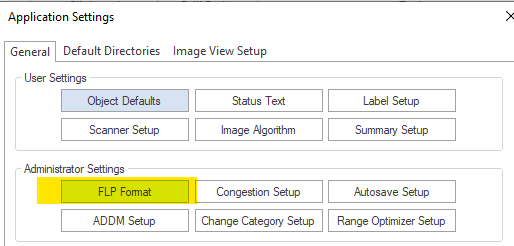
Step 2: Select ‘FLP Format’ in the Application Settings window.
Step 3: Click ‘Refresh’ in the Planogram Format Setup window that appears. This will, in turn, update your values from the database.
If the above steps do not work for you, please create a support ticket and DotActiv support will assist you in uncovering the issue.