The purpose of this article is to unpack the different shelf options that you have when working on a gondola or planogram in the DotActiv software.
When building a planogram in the DotActiv application, you can apply various shelf features to make space planning an accurate, user-friendly, and time-efficient process.
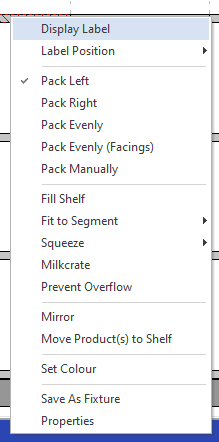
With a planogram open, you can right-click on a shelf to bring up the below context menu. In this menu, you’ll find various shelf features that you can apply to your planogram.
Display Label And Label Position
The ‘Display Label’ and ‘Label Position’ options do exactly what each says.
The ‘Display Label’ option makes the label on the shelf appear/disappear, whereas the ‘Label Position’ indicates where the label will be shown on the shelf if you’re using it.
Please note that the visibility of the fixtures’ labels can also be controlled in the ‘Labels’ option as illustrated below:

If you would like to know how products can be positioned and spread on a shelf you can view this article.
Shortcuts And Limitations
The next set of features refers to shortcuts and limitations that can be set to create an accurate planogram in a time-efficient manner.
Fill Shelf
The ‘Fill Shelf’ feature allows you to automatically fill the shelf without having to guess the number of facings that will fit. This is very helpful in the case where the shelf only has one featured product. You can also apply this option when there are multiple products on the shelf.
In such a case, the shelf will first divide the facings evenly between the different products and then start to add an additional facing to each SKU from left to right (until the shelf is filled).

Fit to Segment (Depth and Width)
A gondola or planogram usually consists of a number of drops, also known as segments. It might happen that a segment’s width is adjusted and the existing shelves don’t correspond with the segment’s dimensions (depth and width) anymore.
It might also happen that you add a new shelf to a gondola, where the new shelf’s dimensions don’t correspond with the segment it has to fit in. ‘Fit to Segment’ allows you to automatically update the depth and width dimensions of a shelf to be the same as the corresponding measurements of the segment.
Depth and width can either be updated separately or simultaneously.
In the above example, the shelf’s dimensions are compared to the gondola’s overall dimensions. This is because the planogram used in the illustration is a one-drop which implies the depth and width of the segment is equal to the depth and width of the gondola.
In the case where a gondola with multiple segments is used, the shelf’s dimensions will be applied to what the depth and width are of the corresponding segment as indicated in the ‘Segments’ section of the ‘Gondola Properties’ pop-up window.
Squeeze (Width, Height and Fixed Products)
When it comes to shelves that overflow, there is an option to squeeze products on the shelf. When using the ‘Squeeze’ option, it is essential that you are realistic with what products are being squeezed.
For example, chips packets that are filled with air have some room to squeeze, whereas milk cartons/boxes won’t be able to squeeze on a shelf. Furthermore, you should be realistic with how many products you squeeze on a shelf (the number of facings). As a guideline, we recommend that you only squeeze products that flow over with half of the product’s width.
In the case where a product overflow’s on its full width (thus, one complete X facing is flowing over the shelf), it is recommended that the shelf loses a facing rather than squeezing the products on the shelf.
Items can either be squeezed in its width (see the image above) or in its height or both. Since DotActiv’s merchandising principles advise that you leave some space between the top of a product and the bottom of the shelf above it, it is advised that you use the height squeeze option with careful discretion.
You might come across an exception where you have to squeeze a product in its height (see the image below).
It might be that you come across a shelf where products that can squeeze and products that can’t squeeze share a shelf. Usually, when you select the ‘Squeeze – Width’ option, it will squeeze all the products on the shelf. However, there is a way that you can set the shelf to only squeeze the squeezable products on the shelf, whilst keeping the unsqueezable products fixed.
First, you will have to set the ‘Prevent Squeeze’ option on products that are unable to squeeze (see the image below). This can be done by double-clicking on a product (or right-clicking and selecting ‘Properties’) where the ‘Product Properties’ pop-up window will appear.
Once the pop-up window appears, go to the ‘Product Attributes’ tab and select ‘Prevent Squeeze.’ Apply this to all ‘fixed’ products. Ensure that the ‘Prevent Squeeze’ box is unticked for all products that can be squeezed. After these products’ limitations have been set you can select the ‘Squeeze’ option of the shelf, where only the squeezable products’ dimensions will then be adjusted as a result.
Milkcrate
The ‘Milkcrate’ option will appear once you have enabled the option as well as exceeded the number of products that can fit on a shelf. The moment the products flow over the shelf, the ‘Milkcrate’ option makes groupings of the different products by creating blocks with the number of facings in each.
Please note that the ‘Squeeze’ option must be off for the ‘Milkcrate’ option to work properly.
Prevent Overflow
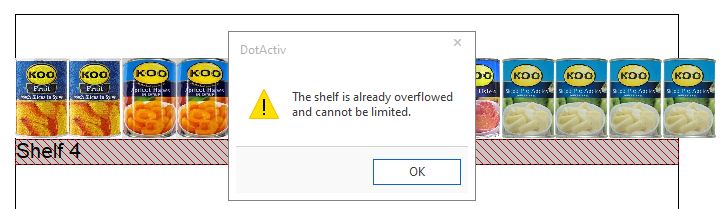
The ‘Prevent Overflow’ option limits the products on the shelf to overflow as shown below. If you set the shelf to ‘Prevent Overflow’, you won’t be able to add more facings over the edge of the shelf. You also won’t be able to add more products to that shelf if the necessary space isn’t available (as illustrated below).
In addition, if you have a shelf that is already overflowing, you will be notified thereof when trying to set the shelf to ‘Prevent Overflow’. Also, note that it won’t make sense to enable the ‘Squeeze’ and ‘Prevent Overflow’ function simultaneously.
Using the ‘Prevent Overflow’ option will enable you to create accurate planograms.
Combine
The ‘Can Combine’ option allows products that are on connected shelves to pack together when both shelves have this setting on.
You can use this function by double-clicking on the desired shelves that you would like to combine. A ‘Shelf Property’ pop-up window will appear. Next, Navigate to ‘Shelf Attributes’ and select the tick box ‘Can Combine’ which is found in the ‘Attributes’ box as seen in the image below.
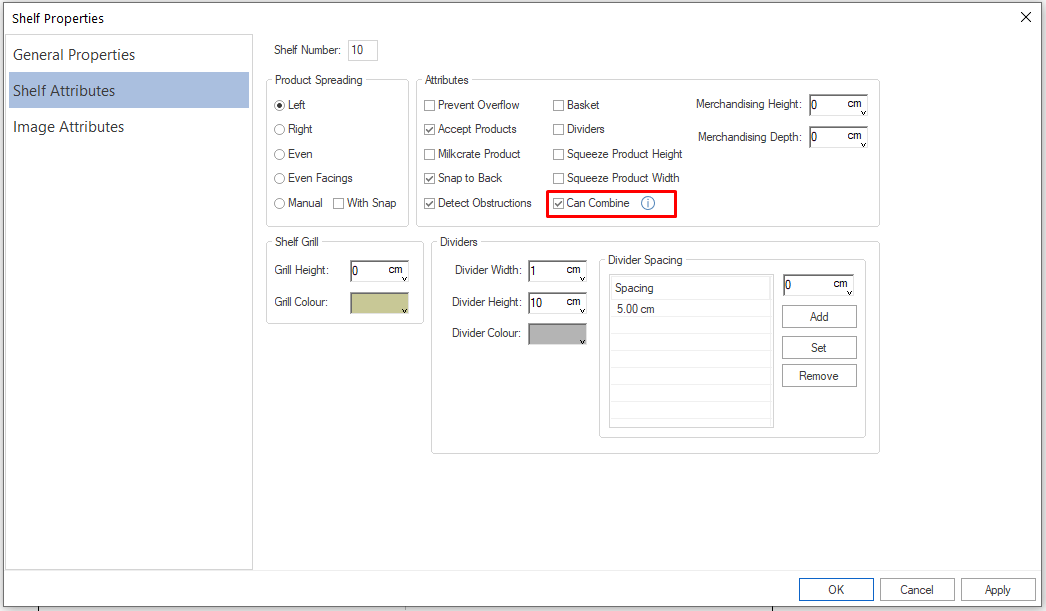
Once you have clicked on ‘OK’. The products on the two shelves that you selected will combine, as seen in the gif below.
Please note that this ‘Shelf Attribute’ needs to be set for both of the shelves and only once you have set this for both shelves, will the products combine.

This specific shelf setting of combining a shelf with other shelves (for product spacing) will be stored in the .flp once saved.
Additional Features
The following section will focus on additional features found in the context menu.
Mirror
The ‘Mirror’ option is used when you want to create a symmetrical horizontal reflection of the shelf you have created. Where products A to Z were first displayed from left to right, products will now display Z to A from left to right (see the example below).
This might come in handy if one store’s display is the inverse of another. In this way, you can just mirror the shelf or gondola rather than building it from scratch.

The ‘Mirror’ option of the shelf is equivalent to the ‘Selected’ mirror option in the ‘Tools’ bar.

Move Product(s) to Shelf
The next option allows you to automatically add multiple products (or groupings of products) to a shelf. The ‘Move Product(s) to Shelf’ option allows you to either add products that are already on the planogram/gondola to a certain shelf or to add products from the Product Report which has 0 Actual Facings to a certain shelf.
Let’s start with adding products from the Product Report to a shelf.
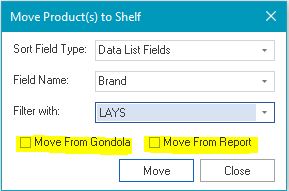
In the example below, you can see that the Product Report has seven lines of Lays chips, of which only three lines (the big Party Packs) are not on the shelf. You will see that the Party Packs have ‘0’ Actual Facings in the Product Report. Once the ‘Move From Report’ option is selected after clicking on the ‘Move Product(s) to Shelf’ option, these three Party Pack items are inserted to the selected shelf.
Furthermore, you can move products that are already on the planogram to a selected shelf on the planogram. The drop-down options of the various fields in the ‘Move Product(s) to Shelf’ pop-up window allows for different ways to group products to move.
Let’s look at the two examples below:
The first example includes moving products of one segment onto a shelf. In this case, we have chosen to move all products in ‘Segment 1’ to the selected shelf. Note that sections will always be numbered from left to right in ascending order.
The second example illustrates how all products of a certain brand are moved to the selected shelf.

Set Colour
This option is straight-forward. You can set the colour of a shelf should you wish to do so. This might be helpful if you want to bring attention to certain products on certain shelves, either accompanied by a descriptive shelf name or banner.

Save as Fixture
It might be that you create a shelf that you know you will be using a lot in the future. Instead of creating the shelf (with its unique dimensions and attributes) each time, you can save it as a fixture and recall the shelf with all its saved attributes (colour, dimensions, packing and other limitation settings etc.). This can be done by creating the shelf, setting its features as desired and then right-clicking on the shelf and selecting the ‘Save as Fixture’ option.
This fixture is then saved to your Fixture Library, where it can be recalled on any planogram you work on in the future. Simply go to the ‘Tools’ tab and select ‘Fixture Library’ in the ‘New’ section (see the image below).
The Fixture Library will appear on the right-hand side where the saved fixture can be selected in the ‘Shelves’ dropdown. Should you want to remove the saved fixture, you can right-click on the fixture name in the Fixture Library and click ‘Delete’.
Spacing Function
This feature allows the user to adjust the Y position of shelves within a selected segment or drop.
The function is accessible by right-clicking on any fixture within a gondola, scrolling down to the option that reads “Fixture Spacing” and within the pop-up window selecting how the fixture should be spaced.
The options available for the Fixture Spacing are as follows:
- Above Fixture: This allows you to select all the fixtures above the selected fixture.
- Below Fixture: This allows you to select all the fixtures below the selected fixture
- Entire Segment: This allows you to select the fixtures in that entire segment.
The Spacing window allows the user to insert the fixture spacing in centimetres as desired.
Please refer to the practical example below:

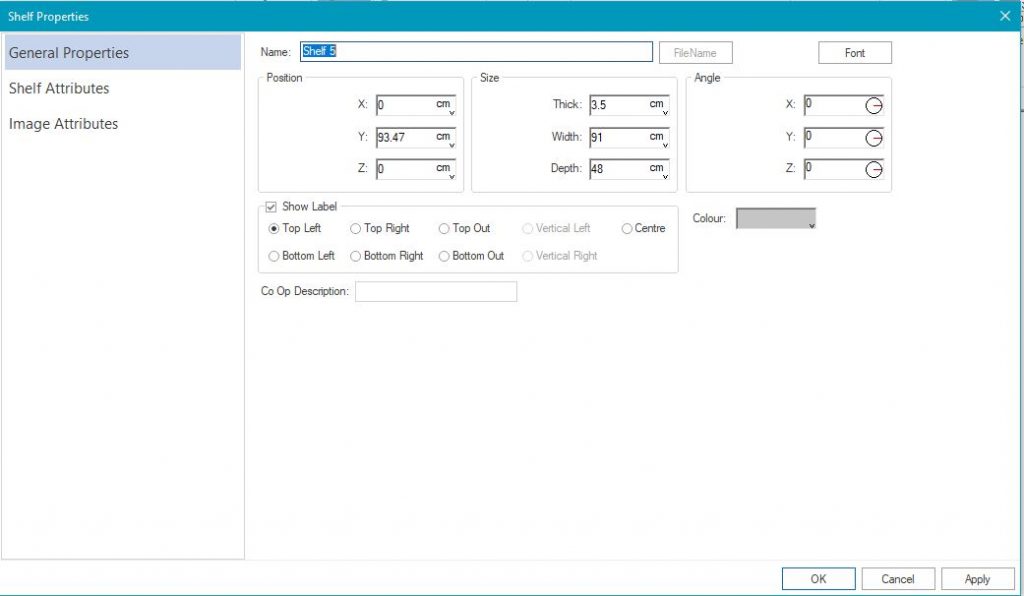
Properties
The properties option takes you to the ‘Shelf Properties’ pop-up window, which is also accessible by double-clicking on the shelf. Here you can set the shelf’s dimensions, change attributes and even import images (like a branded label).
Taking all the above into consideration, you will now be able to build accurate planograms in an efficient manner.
Should any of the above options not work for you, please create a support ticket and DotActiv support will assist you in uncovering the issue.