
If you have ever built a planogram, be it for a client or your store, you’ll know that it’s never complete without good product images. Yes, you can still build planograms without images. However, a planogram doesn’t look the same. It looks half-finished and untidy. What’s more, it appears unprofessional.
That’s one reason of many why product images are essential elements of any planogram. Besides that, including images means it’s easier to understand how your products will look on your shelf. It is a visual cue and can assist the planogram building process. And for your merchandisers, it’s easier to implement a planogram in-store.
Of course, if you want to use product images on your planograms, it is necessary to follow a few steps. That is especially so if you work in the DotActiv software. These steps include the formatting of your images before importing them.
About the contributors
Chris Muller joined DotActiv in 2012. Currently, he is a senior C++ Developer responsible for managing DotActiv's IT development team. He holds a Bachelor of Science (Honours) in Business Computing and Information Systems from the CTI Education Group.
LeAnn Groenewald joined DotActiv in 2020. As our in-house training specialist, she oversees the running of the DotActiv Academy, develops training material and manages and maintains the DotActiv PowerBase. She holds a Bachelor of Commerce (Honours) in Industrial and Organizational Psychology from the University of Stellenbosch.
Sonja Roos joined DotActiv in 2019 as a space planner, working on Makro's Food and Liquor account before her promotion to account manager. She has a Bachelor of Arts in Fashion Media from STADIO's School of Fashion, formerly known as LISOF and a Bachelor of Philosophy (Honours) in Marketing Management from the IMM Graduate School of Marketing.

How to format product images in DotActiv software
When it comes to formatting your images to use in the DotActiv software, there are a few best practices to consider.
Please note, when we talk about formatting images in this context, it’s not in relation to the cleaning and cropping of images. Instead, it’s around file names and so on.
These best practices include:
- The naming convention should be correct. When formatting images for the DotActiv software, you must ensure that it only consists of the barcode of the product.
- Images must be saved in the appropriate folders. For most images in the DotActiv, there are three dimensions - Front, Side and Top. You’d thus need to set up three separate folders as seen below.
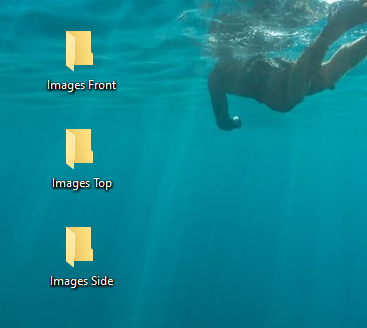 Image folders for the DotActiv software
If you don’t save the specific images in their corresponding folder, when it comes to importing your product images, you’ll receive an error message. That’s because the software can’t find what it’s looking for in the folder. This is the same if you choose to name the file incorrectly.
Once you’ve formatted all of your product images, you’re ready to import them into the software.

How to import product images into DotActiv software
After opening the DotActiv software, navigate to the ‘Data’ tab. By default, you should already be in the ‘Data’ tab when you open the software.
From there, navigate to ‘Import Images’ in the ‘Tools’ section, as seen below.
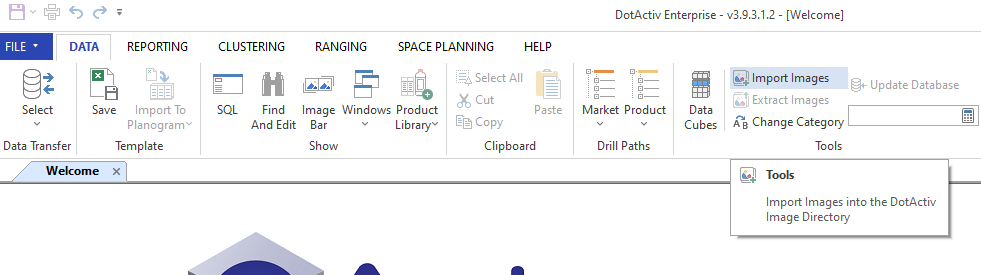 Finding the Import Images feature in the DotActiv software
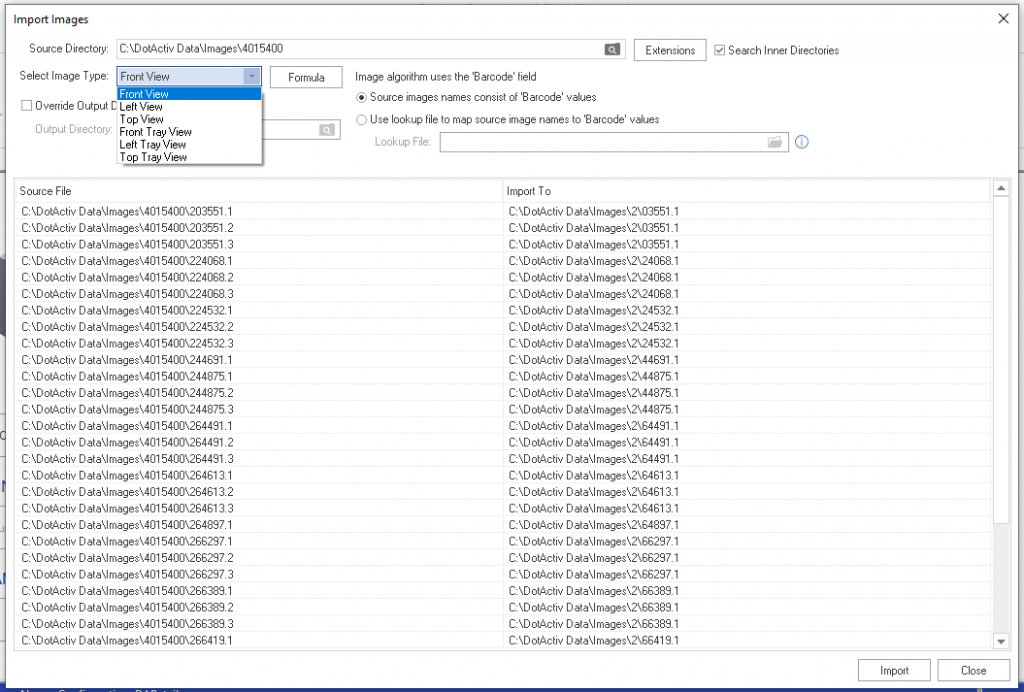
Clicking on this button opens the ‘Import Images’ window where you can begin importing your images.
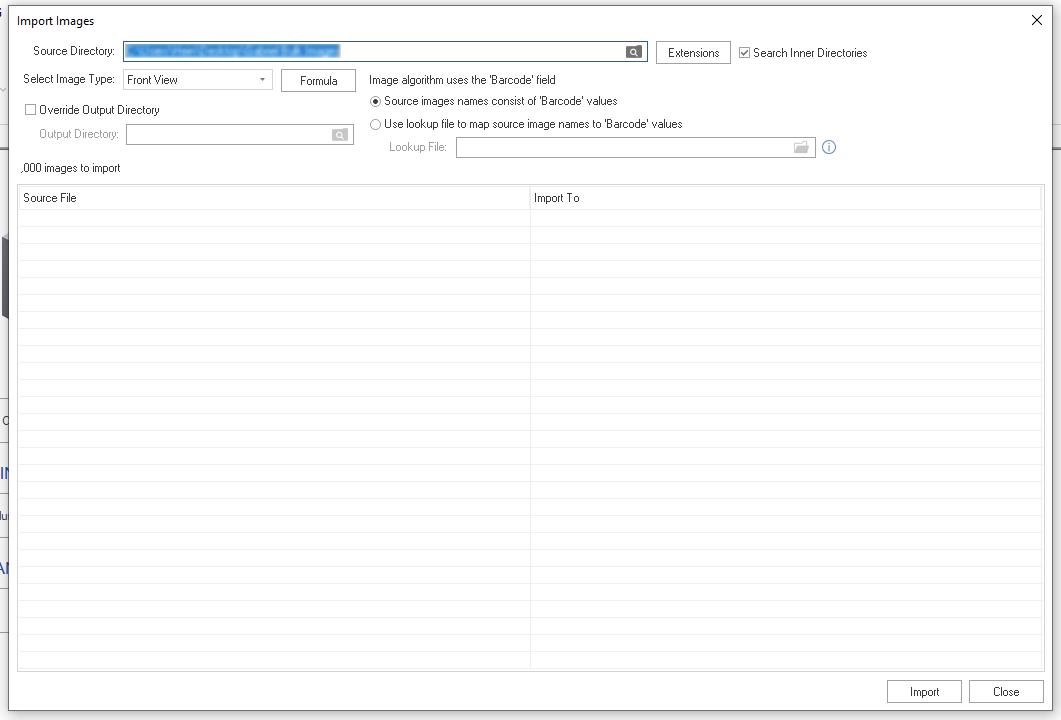 Import Images window in the DotActiv software
First, click on the folder with the magnifying glass in the Source Directory field. Doing so brings up a window where you can browse and select the folder that contains your product images.
Once you have chosen the folder, the next step is to click the ‘Extensions’ button. This brings up the ‘Select Extensions’ window as seen below.
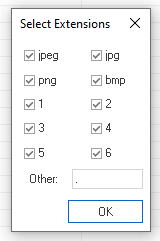 Selecting your file extension in the DotActiv software
You can choose to include all extensions or only a few. If you select all of the options, the DotActiv software will detect all of them. If you were to only choose .png extensions, the software will only search for those to import. You can also choose a different file extension by inputting it in the ‘Other’ field.
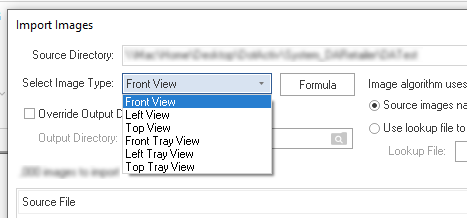
Once done, it’s time to select your image type from the ‘Select Image Type’ dropdown menu as seen below.
Close up of the Import Images window in the DotActiv software
In the ‘Select Extensions’ window that we mentioned earlier, you would have noticed the numbers 1 to 6. Here’s a little more context to them.
 Importing images into the DotActiv software
For the DotActiv software to read the different image types of dimension - i.e. front, top, side and so on, it assigns numbers. For example, .1 refers to the front view of an image while .2 refers to the side view and .3 to the top view.
Setting up the Image Algorithm
Next, you need to set up the image algorithm. The DotActiv software uses the image algorithm to identify and detect specific features of an image.
To set it up, click on the ‘Formula’ button to open the Image Algorithm Setup window. By default, you will not need to change the algorithm. As you might notice, the formula is set to use the barcode value, which speaks to the requirement mentioned above that the images be named as barcode values.
Here, you need to first select the view that you want to map. In the below window, you can see that we plan on mapping the Front View. Failing to choose the same view will lead to your images mapping incorrectly and not pulling through.
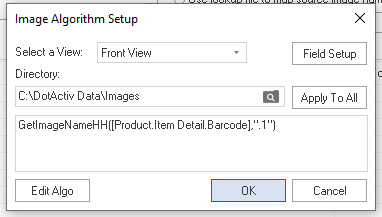
Image Algorithm Setup window in the DotActiv software
You can also see from the above screenshot that once you click on ‘OK’, it will save the images that you import in the folder that is in the Directory field. In the box, you can view your image algorithm.
The formula in the box indicates the extension that the DotActiv software will give to the image files once you import them. Above, it’s ‘.1’, which means it's a Front view.
 Edit Algorithm window in the DotActiv software
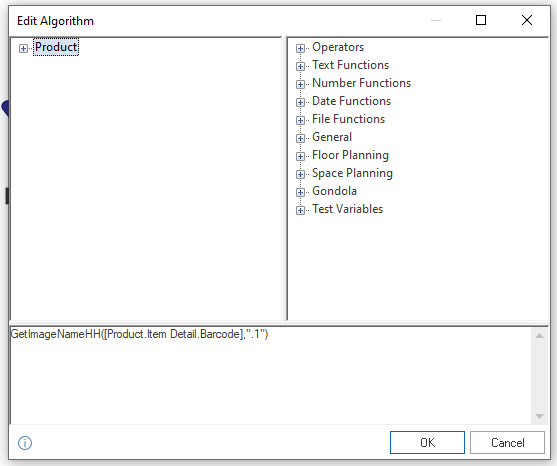
If you’d like to edit this algorithm, you can click on the ‘Edit Algo’ button. Doing so opens the ‘Edit Algorithm’ window where you can make the necessary changes. Once you are satisfied, click ‘OK’.
Confirming the Lookup
With the image algorithm confirmed, it’s time to understand how the DotActiv software identifies your image. If the image consists of a barcode, you can choose to check the appropriate button as seen below.
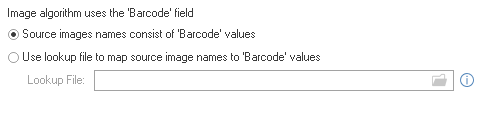 Confirming the Lookup in the DotActiv software
If you want to search for files containing barcodes, you can select the section option - Use lookup file to map source image names to ‘Barcode’ values.
Lastly, it’s time to import your images.
Navigating back to the ‘Import Images’ window, you’ll have the option to review your current source file name (on the left-hand side of the window). It’s titled ‘Source File’. On the right-hand side of the window, you’ll find a box - ‘Imported to’ is the heading above. This is where your images will end up once you have imported them into the DotActiv software. This is derived from your image algorithm and you can confirm whether you have set it up correctly or not.
Once you’re happy, you can click ‘Import’. A popup window will appear asking you to confirm. If you do agree, you’re agreeing to overwrite existing images. Click ‘Yes’ to confirm and you’re on your way to importing your images.
It’s worth pointing out that if you have Top and Side images, you would need to complete the above exercise twice more. If you have Tray images, you would need to complete it again too.

What happens if products don't import?
Having imported your product images into the DotActiv software, you’re now ready to begin building out a visually appealing planogram and one that will capture the attention of your customers.
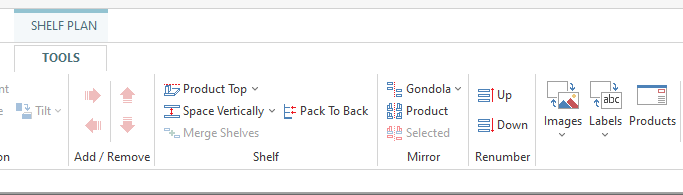
To view your images, you need to turn them on. With a planogram open, you can do that by clicking on the ‘Images’ icon found in the ‘View’ section. If you can’t find the ‘View’ section, first ensure that you are in the ‘Tools’ tab.
 Turning on images in the DotActiv software
With the images turned on, you might see that a few images are missing. That could be because of a few common reasons.
An error with the image algorithm
If there is an error with your image algorithm, you would need to go back a few steps to correct this. Navigate to the window and investigate if everything presents in the way it should. If it’s correct, you can look at the next possible error.
It is also worth noting that as a first pass to identify issues with your algorithm, you can open the properties of any product. You can do that by double-clicking on a product and then navigating to the ‘Image Attributes’.
There you can see the file path to each of your images along with an icon indicating whether or not a file does exist at that path.
This tab also has a button for quick access to view and edit the image algorithm.
An error with the image format
Have you selected all of the image formats from the ‘Select Extensions’ window mentioned earlier in this article? First, go back to view if you did.
If, for example, you know that a few of your images are in .jpeg format and you only selected .jpg, then you can select the appropriate extensions to correct the error. If you have selected all the extensions, make sure you’ve also chosen the appropriate ‘Other’ extensions that are not listed.
An error with the image folder
If you’ve chosen all of the possible extensions, it’s also worth looking at your image folder. Did you select the right folder? You can check this by going to the Image Algorithm Setup window and checking what is in the ‘Directory’ field. If it’s incorrect, there is your solution.

How do extract product images from DotActiv software
So you want to extract your product images so you can see which images you need to complete your planogram.
It’s a straightforward process.
First, create a folder on your desktop and give it an appropriate name. We’ll be placing the extracted images in this folder.
Next, open the planogram that you’re working on in the DotActiv software. With it open, ensure you are in the ‘Tools’ tab. By default, you should already be in the ‘Tools’ tab when you have a planogram open.
You can scroll on the toolbar to the right until you see a ‘Tools’ icon. This icon is right at the end and looks as it does below.
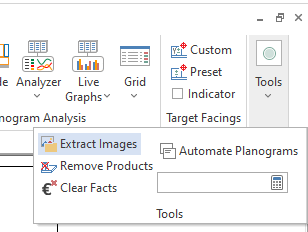 Extracting images from your planogram the DotActiv software
Clicking on it brings up a dropdown menu where you can select ‘Extract Images’. The software will ask you to choose a folder. You can choose the one you created on your desktop. Clicking ‘OK’ pushes all the images to that desktop folder where you can find them. You can now browse through your product images.
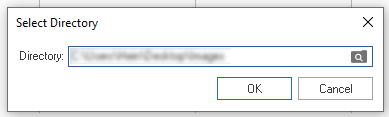 Selecting a directory when extracting images from your planogram
It’s worth noting that along with the images, there will be a CSV file with all the captured product information. That includes columns indicating images for your various dimensions - Front, Top, Side and so on.
If there is a ‘1’ in the column, that means there is an image for that product. If there is a ‘0’, it means there is no image.
Conclusion
Setting up your product images to import into the DotActiv software correctly is straightforward if you follow the steps. Once done, you can build aesthetically pleasing planograms that are easy to understand and implement in-store when the time comes to do so.
Do you need access to software that will allow you to build data-driven planograms that can boost your sales? Or do you rather need expert assistance to build them? DotActiv can help you with both. Visit our online store for more information here or book your custom consultation here.