There is much you can accomplish with the right floor planning software at your disposal. Of course, you first need to ensure you have the right software; and reliability is key. Here’s how you’ll know: For one, it’ll help you achieve your retail goals. It'll also help you to please your customers and encourage them to return to your store.
That said, the above is only a broad overview of what you can achieve with floor planning software. It’s just as important to look at actual software, such as that built by DotActiv, to understand what actions you can take to meet your goals.
1. Create a floor plan from scratch
Before you can hope to achieve your retail goals or please your customers, you first need to create your floor plan. Luckily in DotActiv, it’s an easy and uncomplicated process.
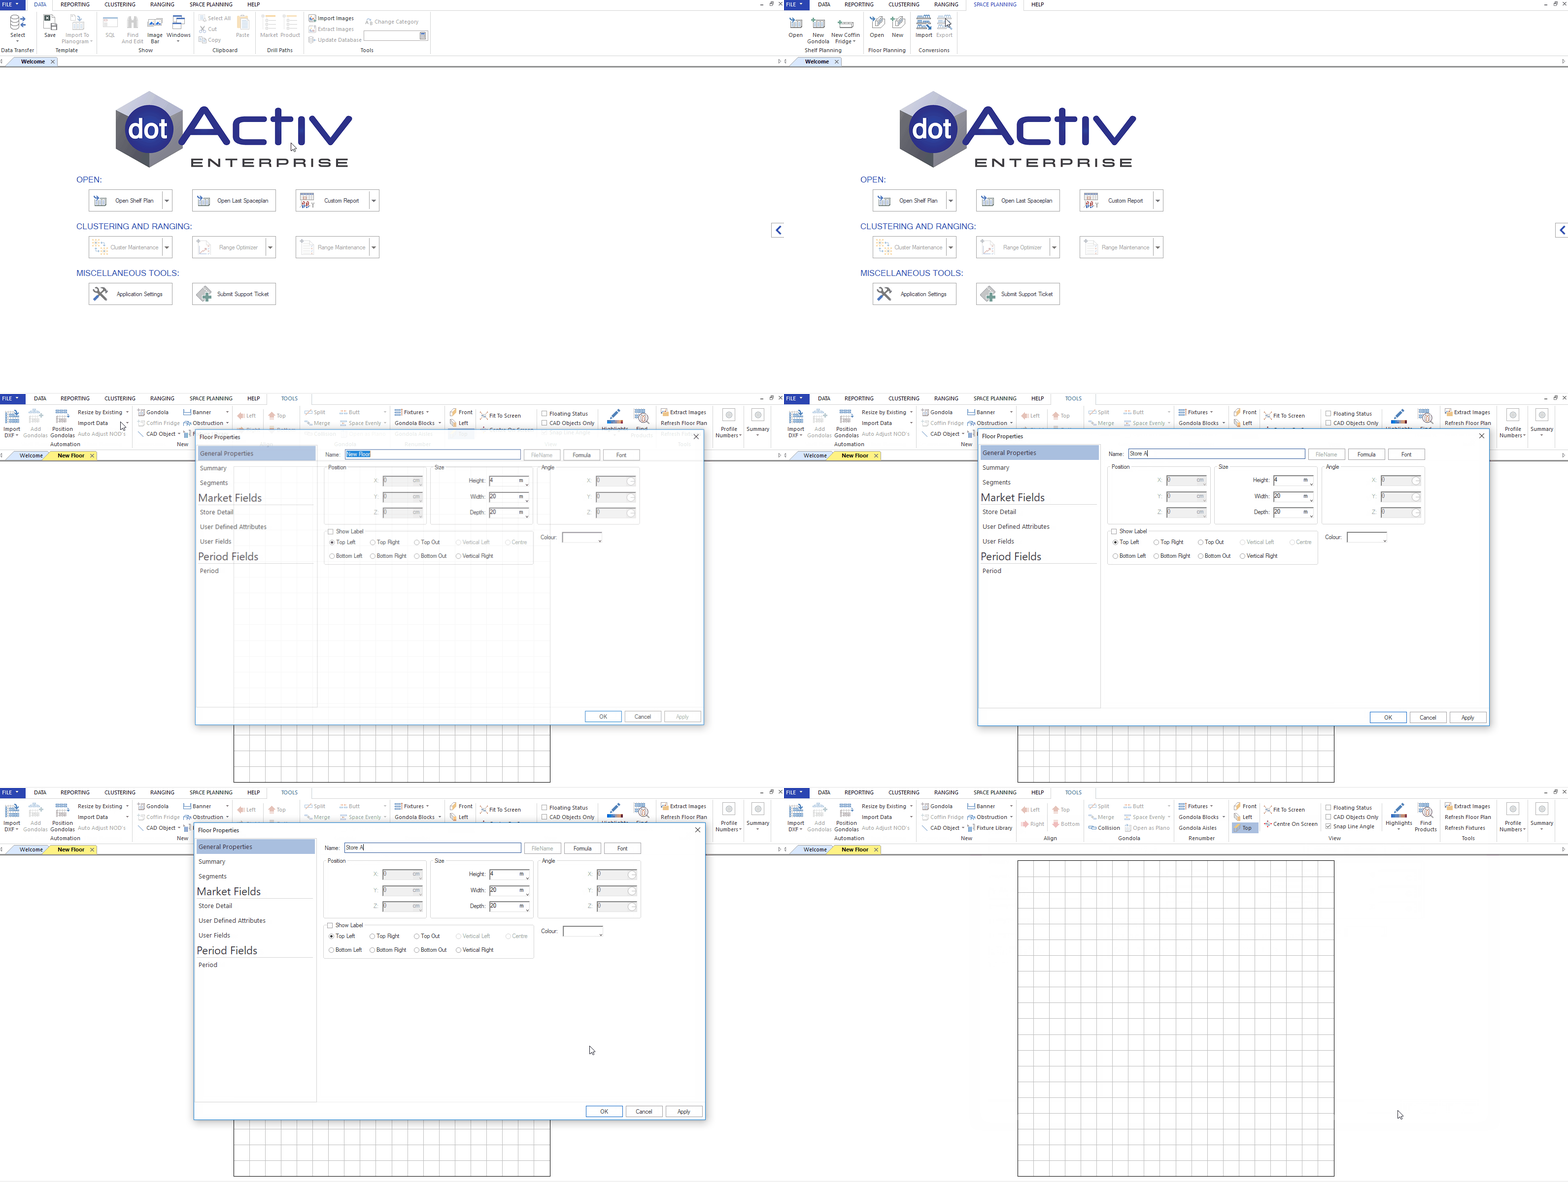
Upon opening DotActiv, navigate to the Space Planning tab at the top. Under this tab, you’ll find a floor planning icon where you can click on ‘New’. This brings up a Floor Properties window where you can input the dimensions of your floor plan.
You’re also able to name your floor plan should you wish. Once you’ve added all the necessary dimensions and clicked ‘Okay’, a canvas will appear (as you’ll notice in the GIF below) on which you can begin creating your floor plan.

A brief look at creating a floor plan from scratch.
The first step is to build the walls of your floor plan. Under the ‘Tools’ ribbon, you’ll find a ‘CAD Object’ icon. By clicking on it, a dropdown menu appears, giving you a few options from which to choose. That includes ‘Wall’, ‘Line’, ‘Gondola Block’, ‘Gondola Block (By number of drops - NOD)’, and Aisle Indicator.
Clicking on the ‘Wall’ option allows you to begin drawing the walls of your store. You can left click and drag down to create your wall. Once you’re happy, right click to exit the drawing function. At this, a pop-up window will ask you if you want to connect the last line you created the closest line to complete the store layout of your floor plan.
Now it’s time for you to create the gondola blocks where you wish to place your gondolas.
To do that, navigate to ‘Line’ under the CAD Object icon. For easy navigation, you can hold your right mouse button in and scroll forwards or backwards with your mouse wheel to zoom in and out. You can also highlight a specific item, hold the Control key on your keyboard and left click and hold to drag it out and create a duplicate of the item.
You can also add any obstructions (by clicking on the Obstructions icon) such as your till points, pillars, and other immovable items.
Next up, you can add your gondola files to your floor plan. You can do that by first finding them on your desktop or folder and then dragging and dropping them onto your floor plan. From there, it’s a simple case of rotating your gondola to fit into your demarcated areas.
And there you have it. Your first floor plan, built from scratch.
Download your free copy of our Floor Planning Ebook and learn how to create the perfect floor plan
That said, there are a few things that can prevent you from creating such a floor plan in DotActiv’s software.
For one, you can’t build a floor plan without data. As mentioned in another article, building a floor plan without data is one of the biggest mistakes you can make.
With retail data, you can accurately decide how much space your categories should receive. If you don’t, you could quite easily give too much or too little space to your product groupings. If you give too little space to a high-selling category, for example, you’d run the risk of running out of stock too quickly.
Besides that, you also need data-driven planograms. Without them, your floor plan is pointless. That’s because the causal data found in planograms is used to calculate your Days of Supply and Gross Margin Return on Investment (GMROI). Meanwhile, there is also your congestion measure, built into your planograms, which informs you of your shelf congestion percentage.
2. Import a pre-existing floor plan (AutoCAD architectural drawing)
If you already have a floor plan and are looking to adjust it, you can do just that.
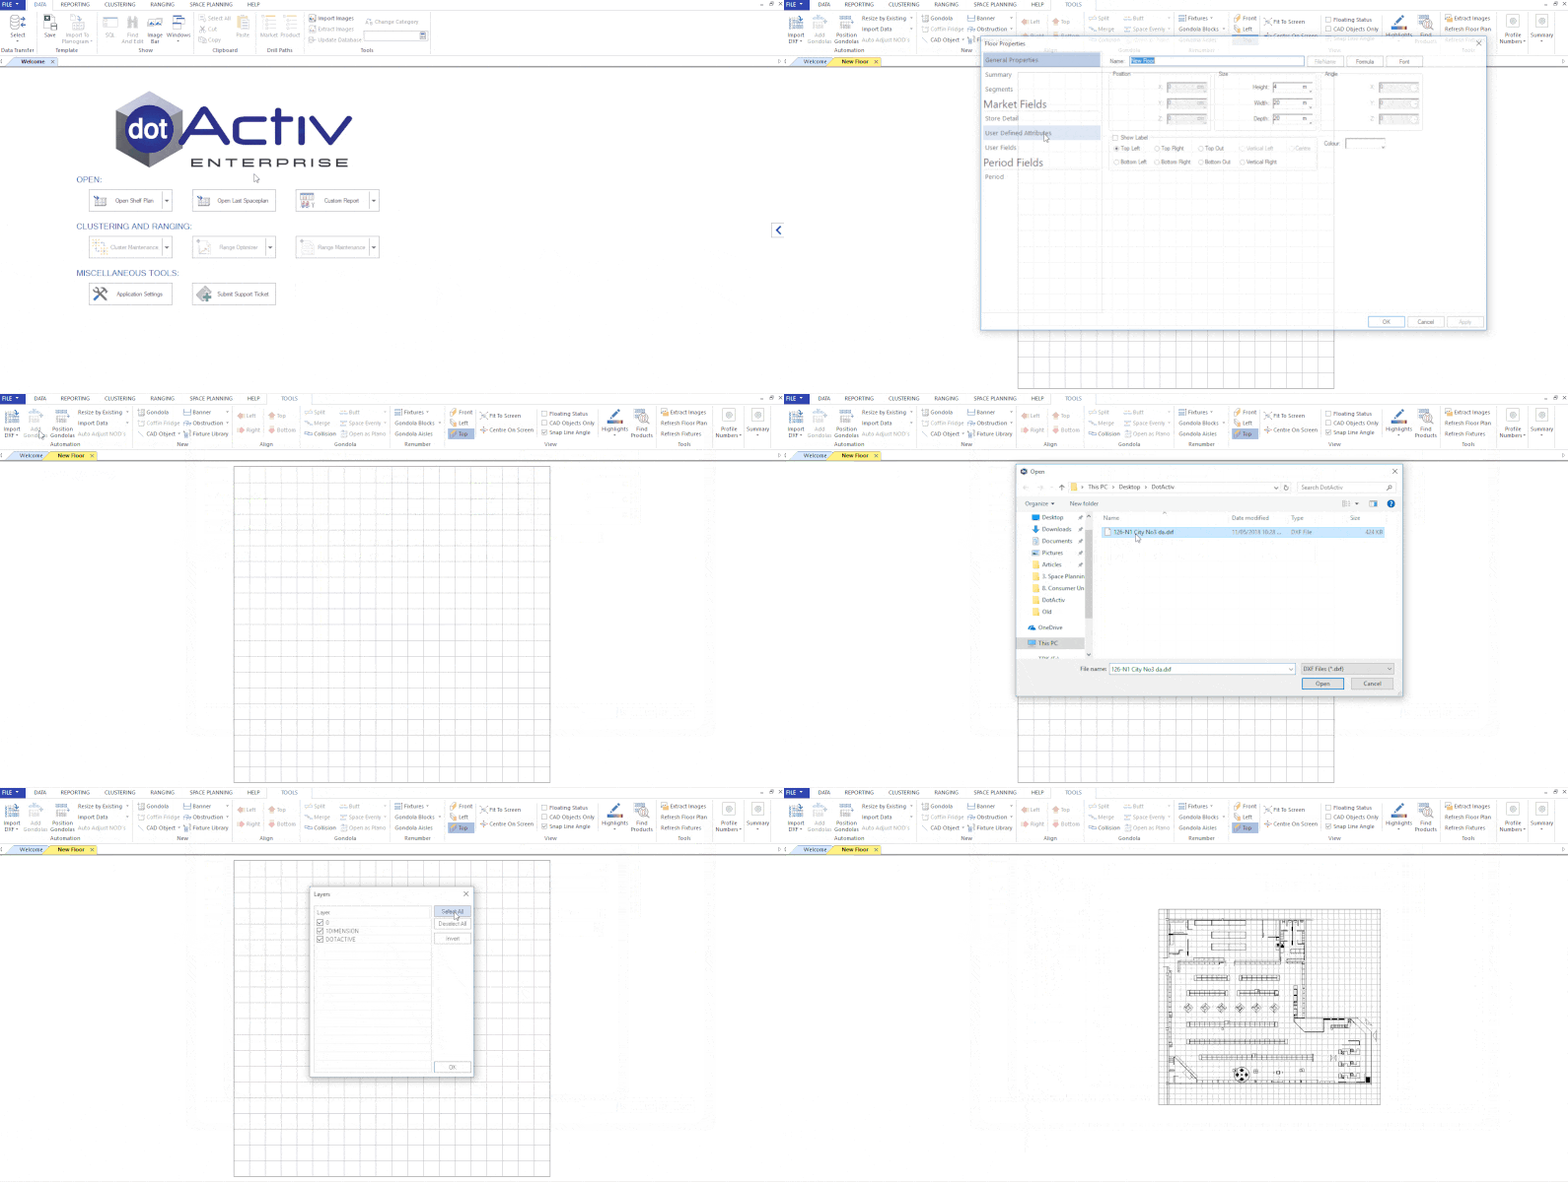
Again, you’d open DotActiv, navigate to the Floor Planning icon under the Space Planning tab, and click ‘New’. Once you’re done with the Floor Properties window, instead of building your walls and creating your demarcated areas, you’d proceed to left-click on the ‘Import DXF’ icon under the ‘Tools’ tab on the extreme left.
Here, you’ll be asked to choose the location of the .DXF file that you wish to import. As a warning note, if you’re not drawing a floor plan in DotActiv, you must be working in a program that saves files as .DXF.
Once you’ve found the specific .DXF file and imported it, a window titled ‘Layers’ pops up. Layers can include, among other things, your plumbing and electrical and you’d want to exclude them from your import.

A brief look at importing a .DXF file into DotActiv.
Once imported, you can right-click and hold to scroll out and locate your store in the drawing. Upon locating it, it’s simply a matter of dragging and dropping your planogram files onto your floor plan.
Double-clicking on a planogram once it’s in your floor plan will allow you to view the various fields of information. This data includes your store and segment details as well as a financial summary, including sales data.
Just a word of warning here: all actual measurements of your fixtures need to be visible and up-to-date to ensure that when your floor plan is rolled out, the space is accurately allocated. Also, incorrectly placed items could lead to the incorrect allocation of space or items being misplaced.
3. Analyse your floor plan using DotActiv’s Highlight feature
A third action you can take using DotActiv’s floor planning tool is to analyze your floor plan using the Highlights feature.
As a side note, when analyzing your floor plan using this feature, you need to first have an existing floor plan open and populated with gondolas.
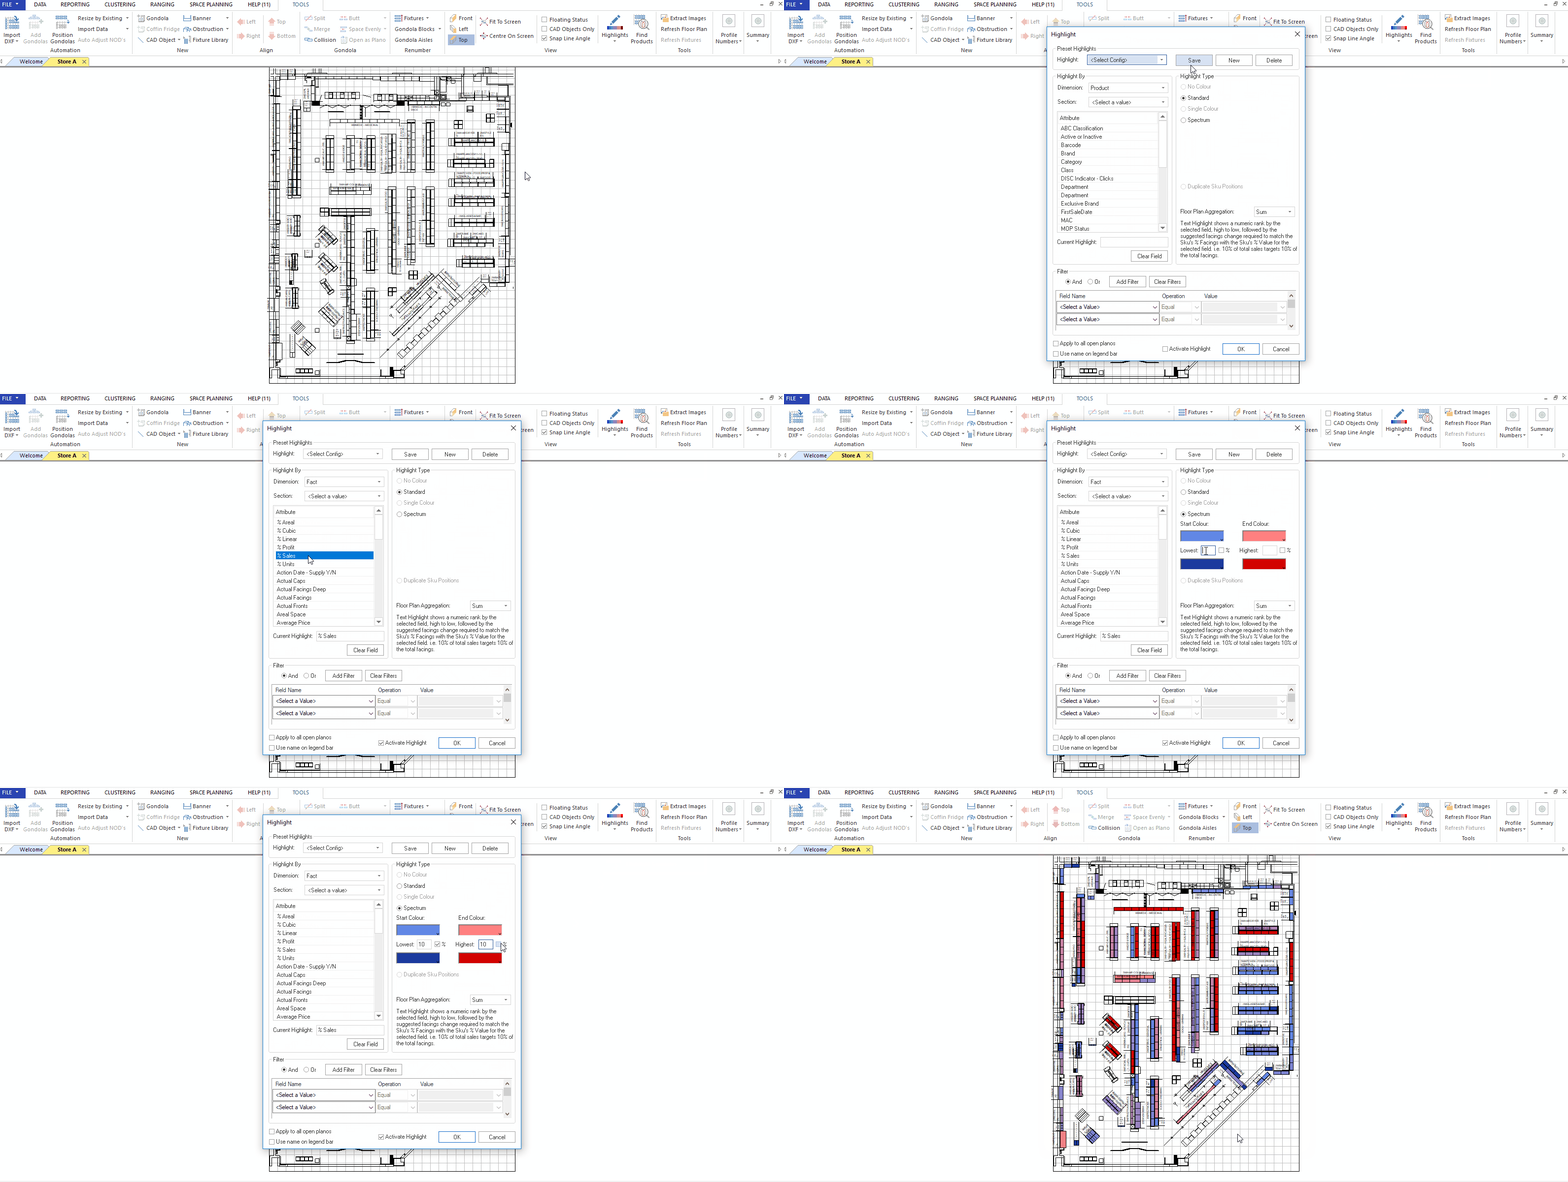
 A brief look at using the Highlights feature.
As you’ll note in the GIF above, once you’ve clicked on the ‘Highlights’ icon in the ribbon, a pop-up window appears, asking you to select the specific highlight you want to create. You can highlight by almost anything, including Days of Supply, Sales, Units Movement, and more.
You’re also able to create a highlight or choose from existing presets.
In the GIF, we chose a Sales Percentage Spectrum highlight, which gives you a visual sense of which gondolas sell the most and which aren’t performing. Then, on the right, you can select your Highlight type. In this case, it’s Spectrum. Lastly, you can customize how you want your colors to display.
By clicking ‘Okay’, you’re presented with a heat-mapped floor plan looking specifically at Sales. If you want to look at your profit margins or units sold, you can repeat the process. Click on the Highlights button and choose a Profit Percentage Spectrum or Units Percentage Spectrum.
As for its purpose, that’s simple. It helps you understand which of your categories are high performers and which of them are poor. You can thus adjust your space accordingly.
At the same time, you can find out if too many high-traffic categories are grouped - which causes floor congestion. In that case, you can spread them evenly across your store.


