
It should go without saying - accurate reporting is vital to your success in retail. If you don’t know how you’re performing at any given time, how can you expect to understand if you’re doing something wrong? More importantly, how can you ever improve? That applies to everything from your planograms to clustering, ranging and, in this case, your floor plan.
Giving too much space to an underperforming category means you’re harming your business since a product grouping that performs well isn’t getting the store space it needs. That’s just one example of many others that you need to avoid.
Fortunately, floor plan reports like those in the DotActiv software put you in a position to understand what’s happening and what you need to do to improve your business.
For the sake of this article, we will only focus on the following reports: Floor, Floor Performance, Store Fixtures and Changes.

Getting started with Floor Plan Reporting in DotActiv
Before starting with floor plan reporting in DotActiv, it is important to set everything up correctly. You can view this as your ‘pre-checks’ before you start. Without ensuring the below is correct, you’ll face issues, which will make the process longer and more complicated.
- Choose a naming convention and stay with it
Whenever you are working with any function of DotActiv software, it is vital to ensure that you choose one naming convention. Once you’ve picked it, stay with it.
The reason for this is simple: if you were to have multiple names, you confuse yourself and the software. You’ll also end up with dirty data. While it doesn’t mean that you can’t work with it, it does make it difficult, and we would recommend it if you want to be efficient.
- Populate your ID or Key Detail field with data
To report accurately, you must populate your ID or Key Detail field with data. This is critical because the DotActiv software uses either when importing your data. That is because the software treats each store as unique because each has different data.
If you want to find out if you have populated either of these fields, open your floor plan. Then, double-click on it to open the ‘Floor Properties’ window. Find ‘Store Detail’ in the left column under ‘Market Fields’. After clicking on it, you’ll see a few fields on the right of the window, including one where you can input your ID or Key detail.
Please note that our floor planning functionality is available to DotActiv Enterprise users and our clients who use our category management services.

Setting up the Floor Plan Reports in DotActiv
The first report is the Floor Plan Report. With this option, you have two options from which to choose. The first is the Gondola Report, while the other is the Floor and Gondola Report.
With your chosen floor plan open, you can click on the ‘Reporting’ tab and in the ‘Floor Plan’ section, find ‘Floor Report’. From the dropdown menu, you can select either option.
 Finding the Gondola and Floor & Gondola Report in DotActiv software
- Gondola Report
The Gondola Report provides you with a high-level overview of all of your gondola information.
After clicking on it, a ‘Gondola Report Setup’ window will appear where you can choose to either tick or untick the ‘Rollup Results’. These combine the results from split gondolas into a single record.
Your Gondola Report will appear, providing you with all the necessary information. It includes the category, format, NOD, Drop Count, Space Planner (DotActiv), width, height and depth and more.
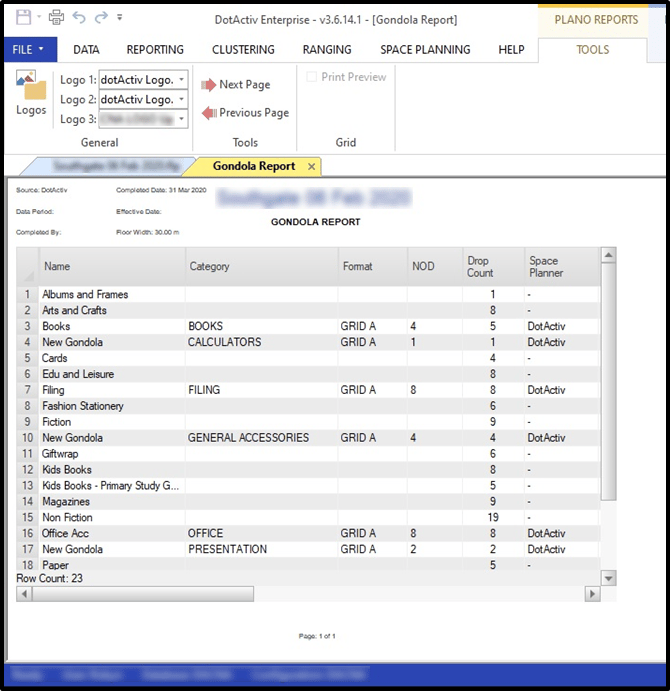 Gondola Report in DotActiv software before printing
Once you’re happy with the results, you can click on ‘File’, and ‘Print’ before printing the document to PDF.
- Floor and Gondola Report
The second option - a Floor and Gondola Report - is the same as the above report. However, we also provide you with a floor plan in the PDF.
After selecting this option from the dropdown, the software will prompt you to choose to tick or untick the ‘Rollup Results’ box in the ‘Gondola Report Setup’ before opening up the report.
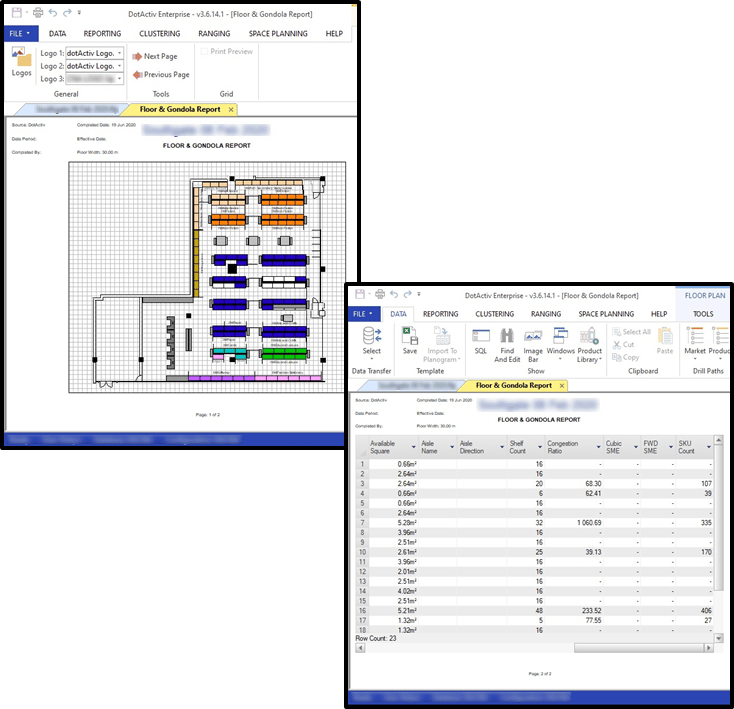 Floor and Gondola Report in DotActiv software
As you can see above, you can toggle between the two windows to see how your gondolas show on your floor plan.

Setting up the Floor Performance Report
The Floor Performance Report is a powerful tool because, as its descriptor points out, it can help you understand the overall performance of your categories and departments in your store.
More than that, it can help you identify all of your hot and cold spots. As we’ve stated before, setting up hotspots can pull more customers into and through your store. They can also help you better manage your customers as they shop your store. By identifying cold spots, you can reposition your categories to optimise your floor space.
You can find this report by opening your chosen floor plan and navigating to Floor Performance in the Floor Plan section in the ‘Reporting’ tab. Please note that you must connect to a database to use this function.
After clicking on the appropriate icon, the ‘Floor Space Performance Setup’ window will appear where you can choose the period/s that you want to use. You can also select which categories you’d like to include or exclude from your report.
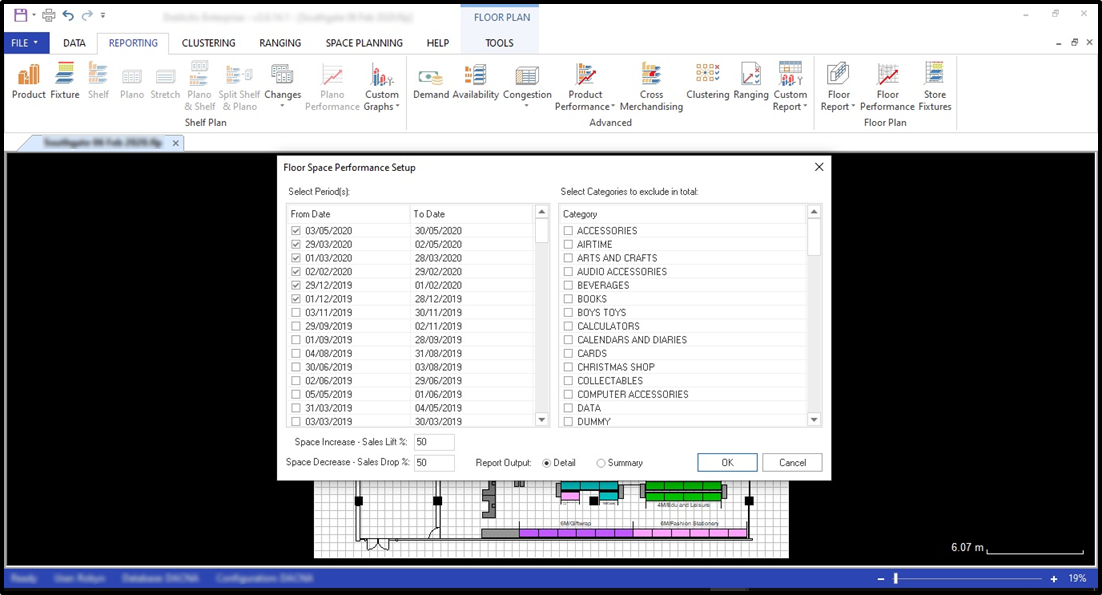 Floor Space Performance Setup in DotActiv software
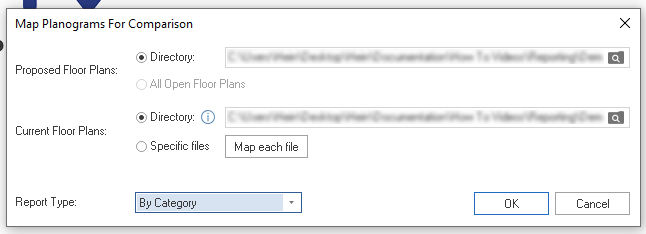
Next, you can choose to have a detailed report or summary. Once you’ve made your selection and clicked on ‘OK’, the ‘Map Planograms For Comparison’ window will appear where you can import new planograms and view them alongside those that are currently on your floor plan.
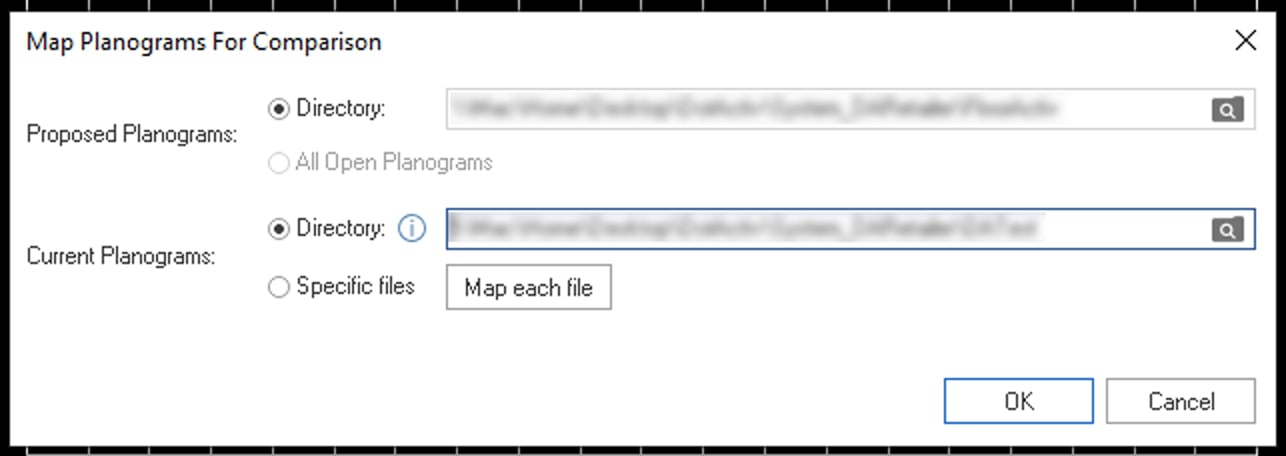 Map Planograms For Comparison in DotActiv software
You also have the option to map each planogram file manually should you want to do that.
Once you’ve chosen which planograms, click ‘OK’ to generate your report.

Setting up the Store Fixture Report
The Store Fixture Report provides you with a summary of all of your fixture types and the quantity within a specific store. For this report to generate correctly, you must classify all the necessary fields in the database.
When using this report, you have the option to either select all of your stores or only a few. As seen in the image below, you must choose them manually.
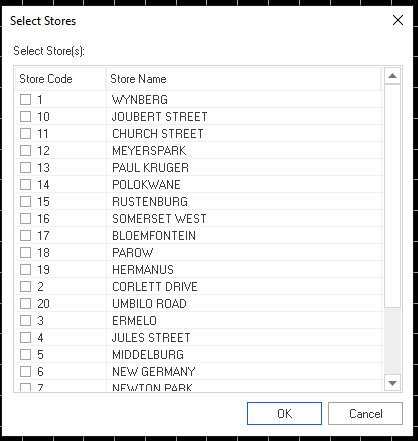 Selecting stores in DotActiv software
Clicking ‘OK’ generates the report that will provide you with a summary of your different types of fixtures in your chosen stores. It includes information on the height, width, depth and quantity of your fixtures, the Sold Space on your shelves, and the Sold Space on your gondola.

Setting up the Changes Report
With the Changes Report, you can inform on any changes that you’ve made based on proposed versus existing floor plans.
To open this report, you don’t need to open a floor plan. With DotActiv software open, navigate to the ‘Reporting’ tab. In the ‘Floor Plan’ section, select ‘Changes’ to begin setting up this report. Doing so brings up the ‘Map Planogram For Comparison’ window as seen below.
 Map Planograms For Comparison in DotActiv's Changes Report
As with the Floor Performance Report, you must choose the appropriate files from a directory. Alternatively, you can use the open floor plan to report your report by selecting ‘All Open Floor Plans’.
If you want to create reports for multiple floor plans, you can select ‘Specific Files’ under ‘Current Floor Plans’.
There is a difference between the two comparison windows. For the Changes Report, you must choose a ‘Report Type’. From the dropdown menu, select how you want the report to look. You have three options from which to choose. They are ‘By Category’, ‘By Department’ or ‘By Merchandise Group’.
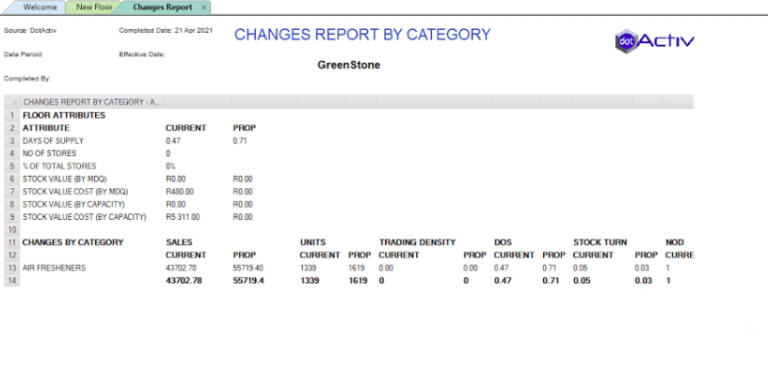
Once you have selected your option, your report will appear and include all the information necessary to understand, as seen below. In the example, we chose the ‘By Category’ report type.
 Changes Report by Category in DotActiv software
Information includes your Floor Attributes such as Days of Supply, Number of Stores, Stock Value (By MDQ), Stock Value (By Capacity) and so on.
There are also your Changes by Category. This updates to ‘Changes By Department’ or ‘Changes By Merchandise Group’ should you select either report type instead. As part of this section, you can view current and proposed changes of Sales, Units, Trading Density, Days of Supply (DOS), Stock Turn and more.
Conclusion
Reporting on your floor plan is a critical part of your retail success. Without it, you will struggle to improve your sales and provide a better shopping experience to your customers.
Do you need assistance understanding how to report on your floor plan or want to know more about how a DotActiv solution can benefit your business? Book a custom exploratory consultation here, or visit our online store for more information.